Finding a perfect online course creation tool takes research and testing. I already have experience with some tools, like SamCart, but not with all.
So, I started testing the top online course creation tools to analyze how they actually work. This time, I’m sharing a Teachable review. If you’re also exploring Teachable as your online course creation tool. Then, this review is for you.
This Teachable review is not just a list of features that are already available on their official site. But I actually signed up for the free trial and tested it to see how Teachable works in the real world.
In this Teachable review, I will share my personal opinions and experiences using it, what I liked most, and also the downsides. Finally, I will cover how much it costs and for whom the Teachable is worth buying.
What is Teachable?
Teachable is one of the most famous online course creation tools. Using Teachable, you can create and sell various digital products, such as courses, digital downloads, and coaching sessions. If you’re building a subscription-based online education business, then the membership feature is also there.
Quick Overview
Here is the quick overview of Teachable, based on my personal experience using it.

Teachable is the simplest and easiest-to-use online course creation tool. It allows you to create and sell multiple digital products: courses, coaching sessions, and digital downloads.
Pros
Cons
For a more in-depth review of its key features, pros, cons, and pricing, continue reading the article.
Teachable User Experience and Ease of Use Review
The one thing that I liked most about Teachable is the user experience. When I first signed up for Teachable, the process of signing up and navigating to the platform was super easy.
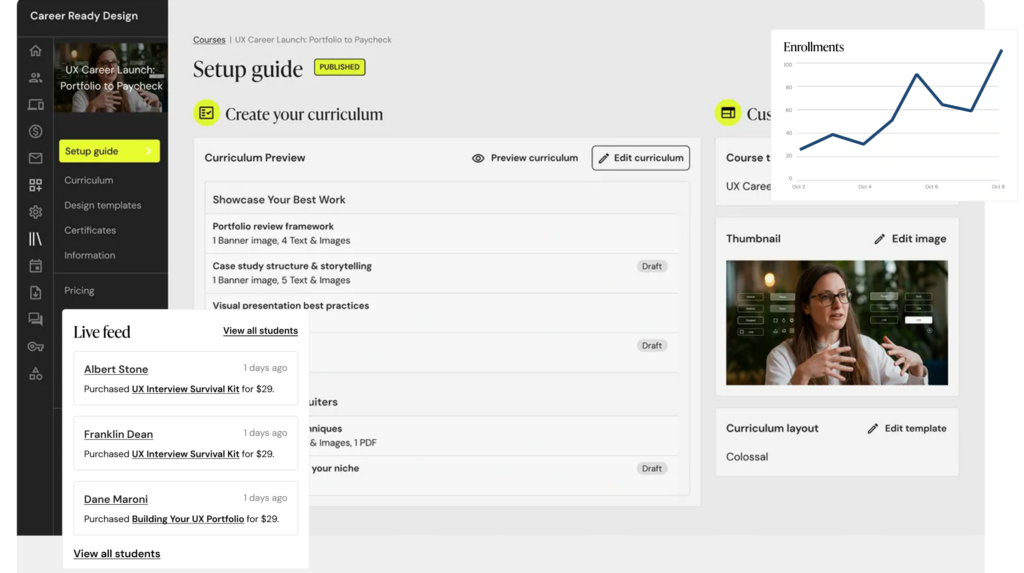
Sometimes, when we sign up for a new tool, we wonder how to navigate the platform. And we need to spend some time getting familiar with it, or knowing where the features are. But the Teachable user interface is so user-friendly, everything is properly organized under the left navigation bar, and it didn’t take me time to get familiar with the Teachable dashboard.
Another example of ease of use is that you don’t have to go back and forth to create courses or any other digital product. Because every digital product, whether it’s a course, a digital download, or a coaching session, Teachable provides a setup wizard.
Set up wizards step-by-step guide you to easily create your courses and other digital products.
Teachable Core Features Review
Let’s now review the key features of Teachable one by one to see the actual reality of this tool.
1) Set up Your School
Once you create your Teachable account, you first need to set up the school. Within a school, you can create your digital products, such as courses, digital downloads, or coaching sessions.
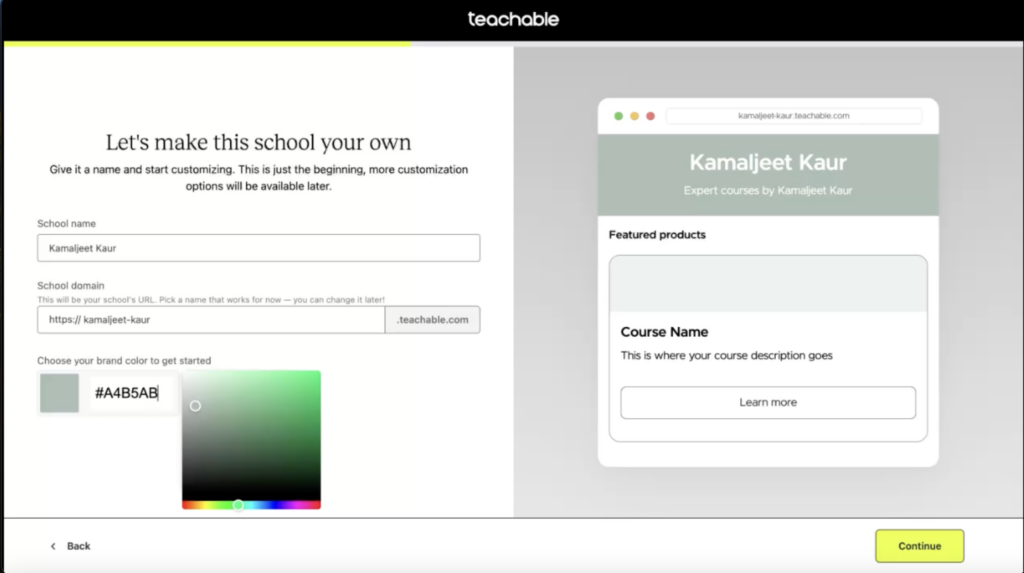
Setting up a school is super easy in Teachable. You can set up a custom school name, business name, email sender name, mailing address, and a custom reply to email, even in the starter plan.
2) Course Creation Tools
Course creation tools allow you to easily create, manage, and edit your courses. So, let’s cover what course creation tools you will get with Teachable.
Outline Your Course
For creating a course, the first and most important thing is the course curriculum. In Teachable, you have 3 options for creating a course outline.
- AI: AI is now everywhere. You can also use AI to generate your course outline in Teachable. All you need to do is just describe your course, and Teachable AI will draft a Course outline for you.
- Create manually: If you’re not an AI fan, you can also create your course outline manually in Teachable.
- Bulk upload: In case you have already created the course curriculum outside of Teachable, then you can simply upload the relevant files using the bulk upload feature. And, based on that, the course outline will be automatically created.
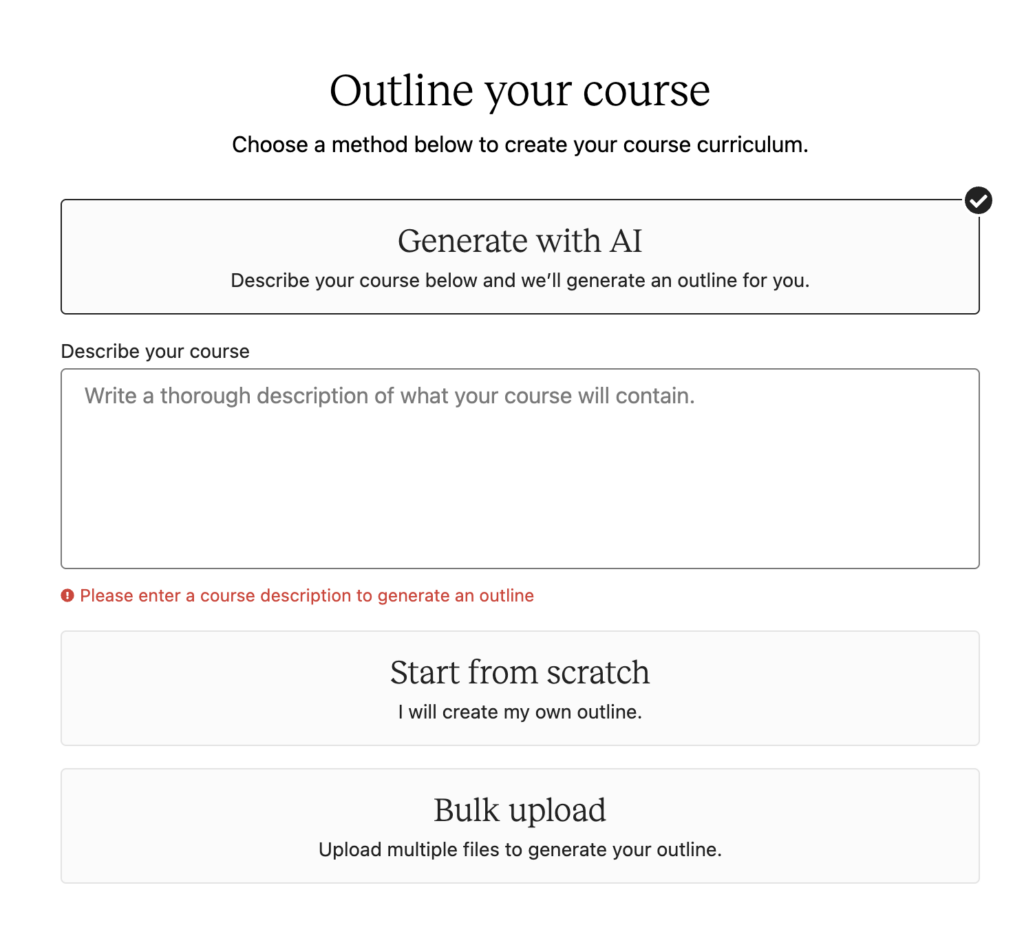
I tried the Teachable AI course outline feature. For this, all you need to do is enter a brief description of your course. Based on that, it will automatically create the initial course curriculum draft, which you can review and edit.
No doubt the AI course outline feature can save the time that you have to spend on researching. But depending solely on AI is not a wise decision.
Because at the end of that day, your course should deliver real value to make real revenue out of it.
And for this, you should focus on creating valuable courses to help your students. Your Course should not be another generic course that lives on the internet. But does not deliver value and gets no sales.
With Teachable, you can easily edit your course curriculum; it’s pretty straightforward. You can drag and drop units or lessons to adjust ordering. And with the preview option, you can view how the course curriculum will look at the student’s end.
Simple and Easy-to-Use Course Lessons Builder
The Teachable lesson builder is very simple and easy to use, even for beginners. When I first used the Teachable course lesson builder, I had no confusion as the interface is so easy to use.
In the middle of the lesson builder, you have a button for “Add Content”. Once you click on the right side, you’ll see all the content type options, which you can use to build your lesson content.
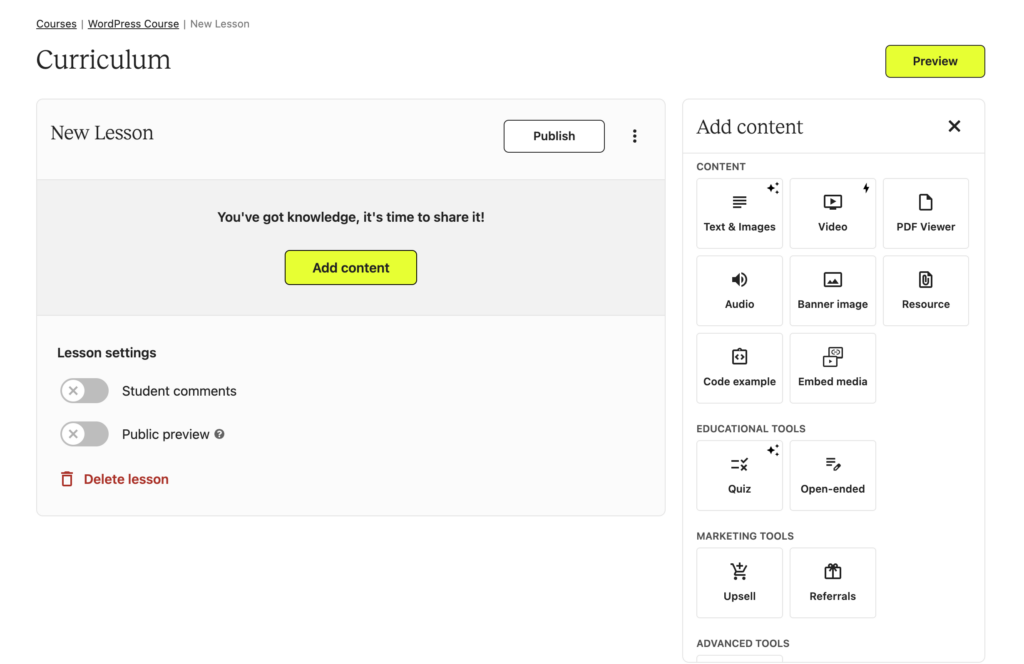
What I liked most about the Teachable lesson builder is that it allows you to add multiple content blocks to a single lesson. You can add text, images, videos, PDFs, audio files, banner images, resource files, code examples, or embed media files. You can also include the marketing content block within your course lessons. E.g., you can create upsell offers to include at the bottom of your course’s lessons to sell your other digital products.
There are some platforms, like LearnWorlds, that don’t allow adding multiple content pieces in a single lesson. But with Teachable, you don’t need to worry about that. You can click on a content block to start adding the content. For example, to add a video, you can select the video element.
Apart from the video, if you want to add text, you can choose “Text & Images”. Additionally, there are Text formatting options to format your content.
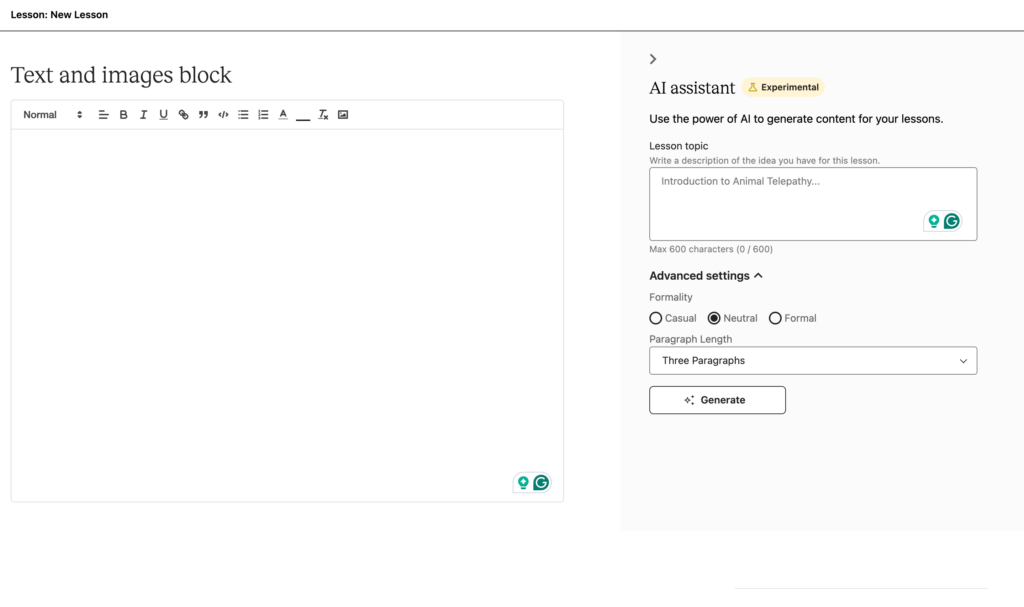
For adding text content, you will also get an AI assistant to draft content for your lesson. I prefer to manually create original and authentic content for my lessons.
Video Hosting
In Teachable, you can either upload videos directly or embed a YouTube or Vimeo video by just entering the video URL.
If you’re uploading the videos, the max file size is 2GB. And with the Free trial, you can only upload 10 videos. But if you’re on the paid plan, you can add more videos.
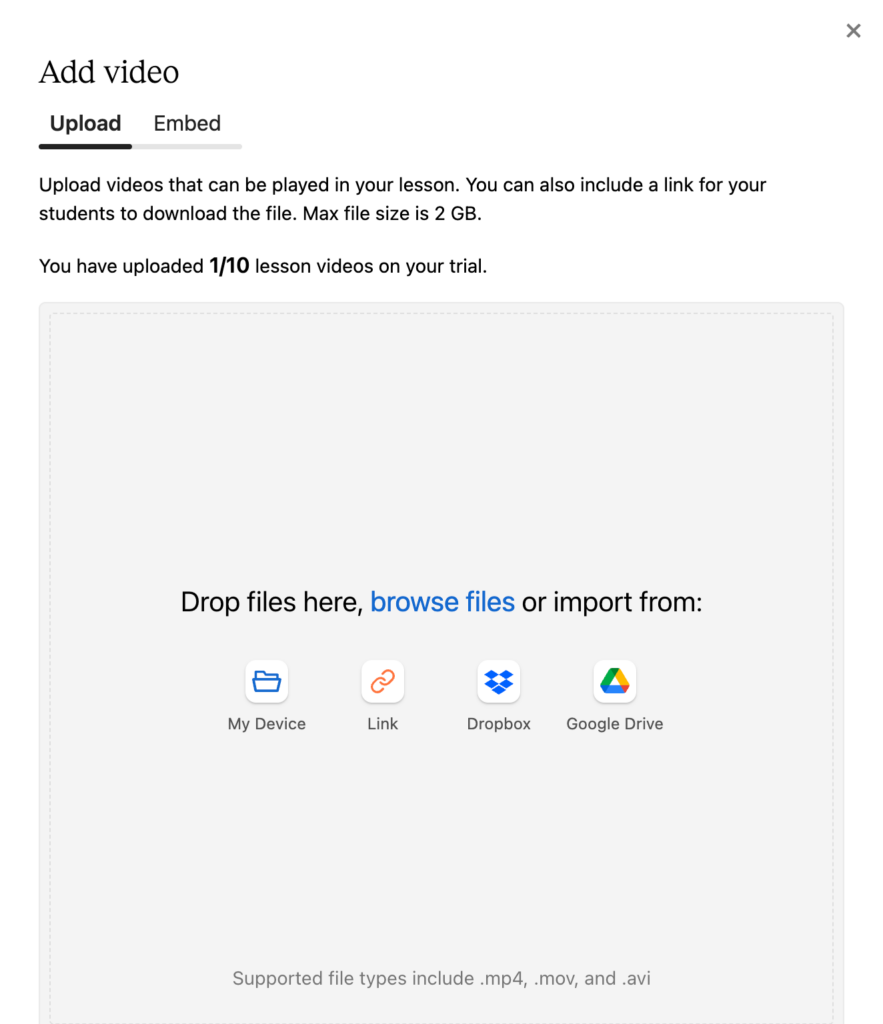
Apart from this, you should also know how much total video storage you will get for uploading videos directly to Teachable. So, no matter which plan you choose, you will have 1TB of video storage, which is more than enough for most creators.
With Teachable, you can also enable subtitles for your course videos. You can either upload the subtitles file or auto-generate them for your videos. If you’re on the lower plans, the Auto subtitle generation feature costs additionally, but it comes Free with the Growth plan.
Drip your Course Units
The dripping feature allows you to set days or dates when each course unit will be released. Not every course creator uses the dripping feature. Because mostly course creators release all the course units at once. But if you want to release course units on specific dates or days, the dripping feature is for you.
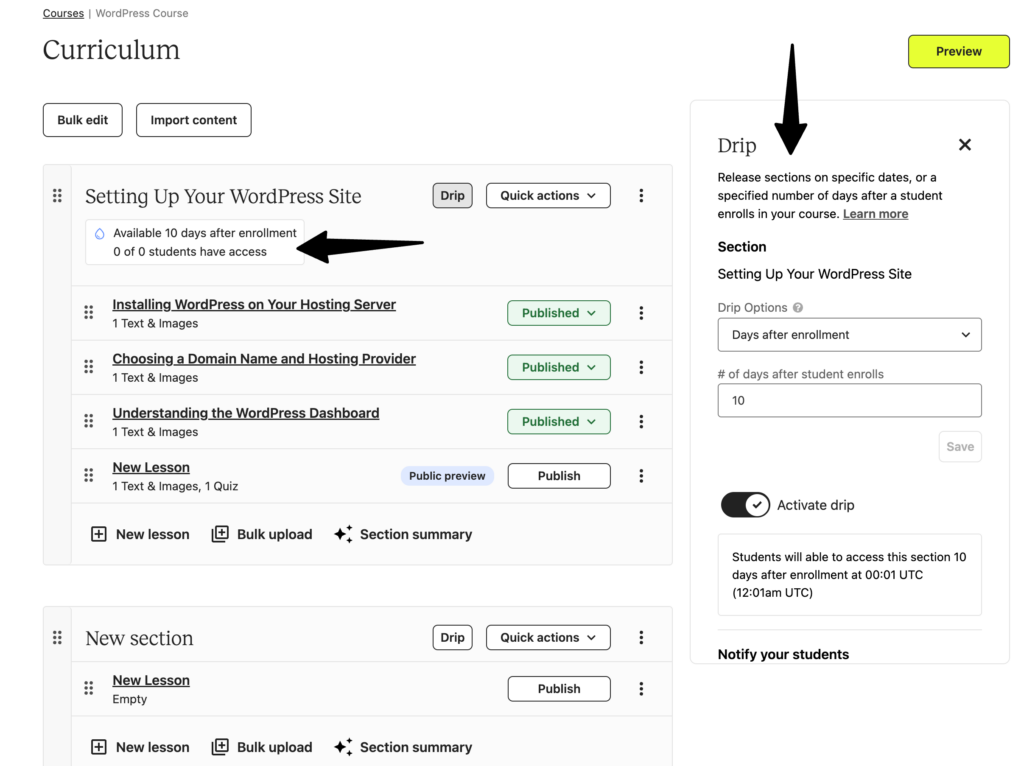
Apart from this, Teachable also allows you to send drip emails to notify your students when a particular unit will be released. And, notifying your student is a must to build trust and authority, because otherwise, they may wonder why all the course units are not available to them.
Public Preview
There is one more quick, interesting feature that I just found in Teachable. With this feature, you can make any lesson or unit viewable, even if the students have not paid yet.
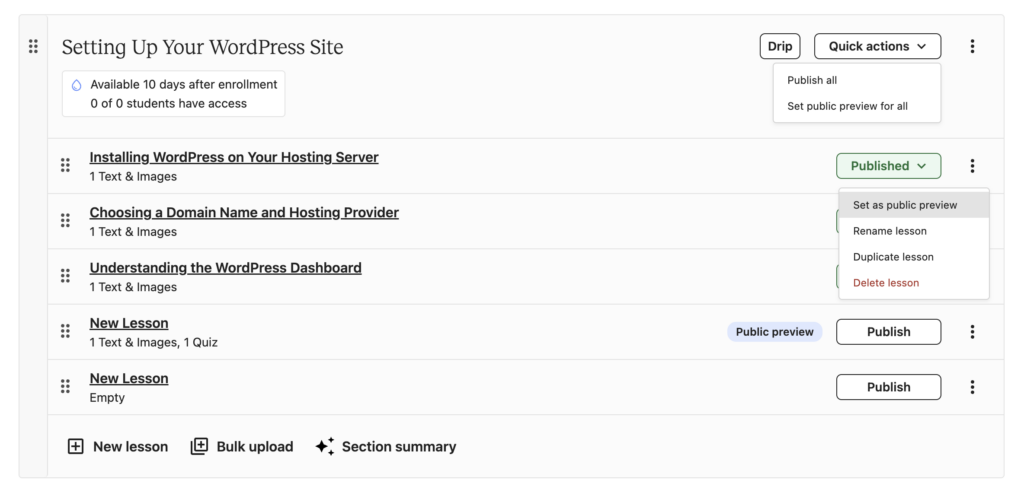
For example, you can make the first 1 or 2 lessons available publicly. So that your student can view some course lessons before purchasing the course.
Course Enrollment and Access Features
Teachable also allows you to set some enrollment and access limits. For example, you can set a limit on the number of students who can enroll in your course. You can also set enrollment start and end dates for your course.
By default, the student will get lifetime access to your course. In case you want to impose limits on course access, you can choose how long you want to give access to your students for your course, for days, weeks, months, or years.
Quiz Builder
When you’re creating a course, the most important tool is a quiz builder. Quiz builder allows you to create quiz lessons for your courses. The best thing is that the quiz builder option is available in all plans.
The quiz builder option is available within the lesson builder. All you need to do is choose the quiz content block to build out the quiz lesson. Again, here are two options to create a quiz: Manual or AI Quiz Builder.
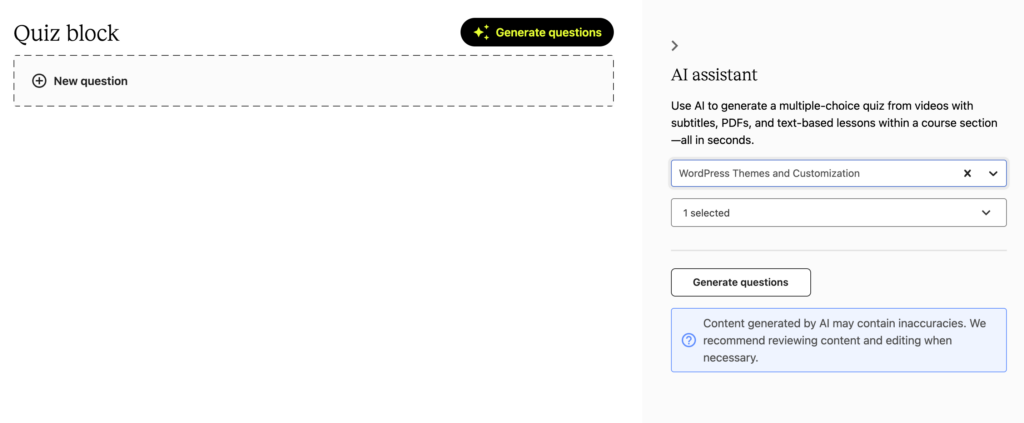
Building a quiz manually is also super easy in Teachable. Enter your question in the question box, and then add answer options. To mark the correct answer, you can mark the checkbox next to the correct answer. That is all you need to do. The drag-and-drop option is there to arrange your questions.
Additionally, there is an AI Quiz builder option, using which you can draft questions. The thing I liked about the AI Quiz assistant is that you can choose a specific section and lesson. And based on that, the AI will create quiz questions.
That means the questions will not be generic; instead, they will be based on the content that you’ve shared. With this feature, you can quickly build relevant quiz questions. You can also edit the questions to make sure they are good to go.
Author Bios
With Teachable, you can create and manage the course author bios as well, even in the starter plan. You can customize the author name, profile image, and bio with a simple mouse click.
One thing that surprised me here is that you can add multiple author bios. Well, this option might not be worth it if you are the only creator, because for you, the one author bio will be enough.
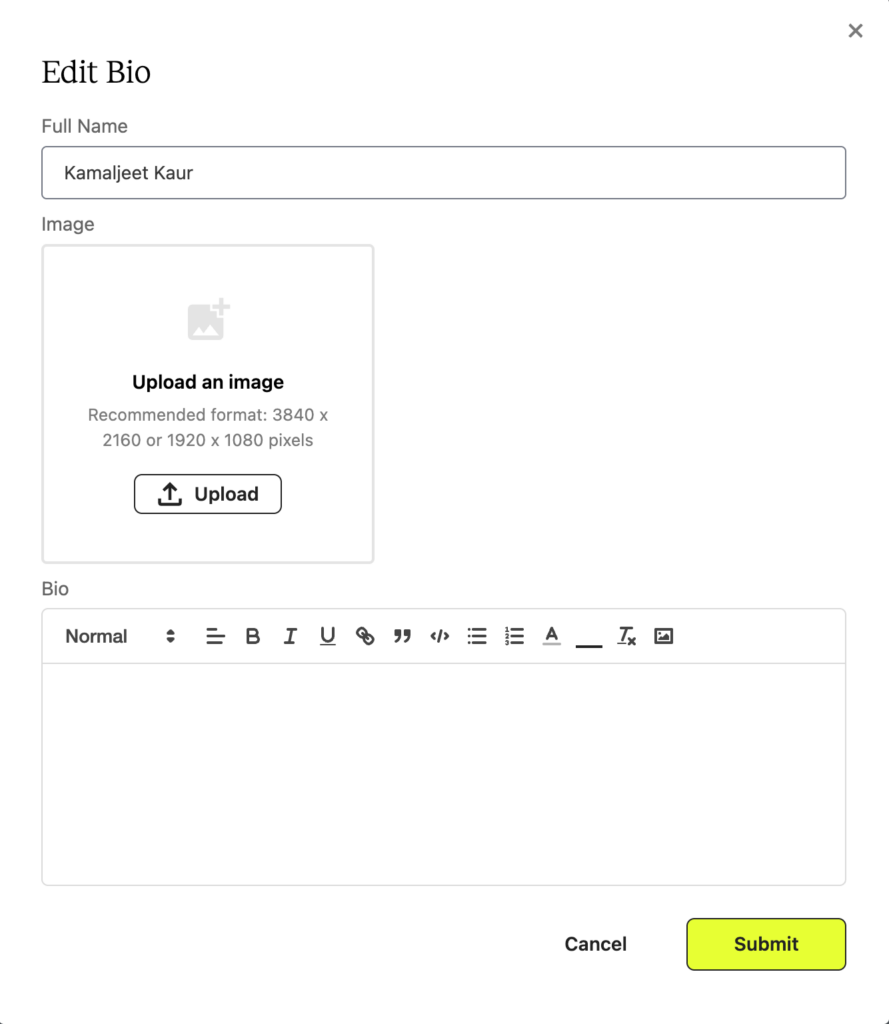
But if you’re building an e-learning platform, then you must add multiple author bios, so in that case, this option will be very helpful.
3) Build and Sell Multiple Digital Products
Teachable does not allow you to create only courses; you can also create 1-1 coaching sessions and digital downloads such as templates, checklists, or ebooks.
And it depends on the plan and how many products you can create. For example, if you’re on the starter plan, you can create 5 products. Product means any published course, coaching session, or digital download.
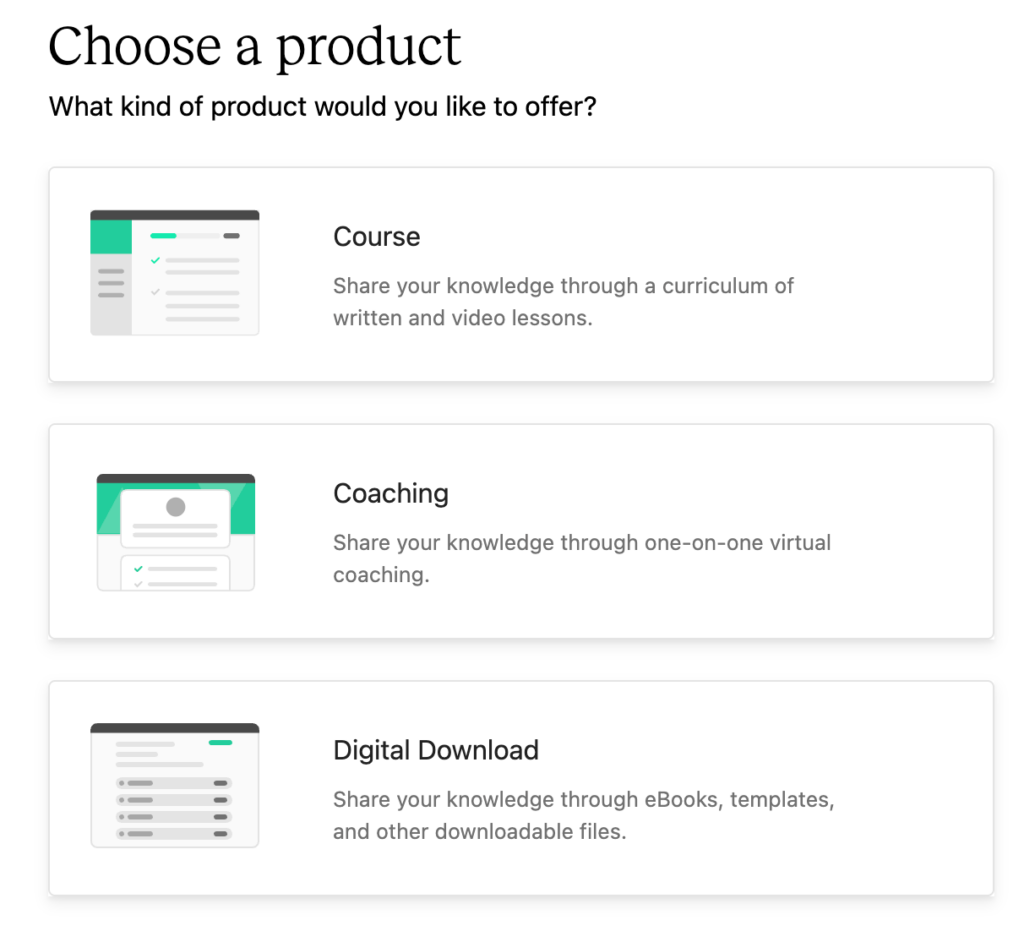
Creating coaching or a digital download is also super easy because Teachable guides you with a step-by-step setup wizard.
You can name your coaching session, choose a pricing option, set its price, and set a coaching date. You can also include a scheduling option so that your clients can select a convenient time.
Similarly, you can also create a digital download product to sell ebooks, guides, templates, or any other downloadable product. You can either upload a file or provide the link where students can access the content.
Apart from this, Teachable provides dedicated sales landing pages and checkout pages for selling every digital product.
4) Build, Manage, and Customize School Website
You build a digital product: a course, coaching session, or digital download, which is perfect. But for marketing and sales, you need a website. And Teachable also comes with website-building features, so let’s talk through how useful they are.
Website Branding and Theme
Teachable has a standard website theme, which will be automatically applied to your website. And there are no other pre-made templates to change your website theme in Teachable.
But Teachable comes with website branding customization features; for example, you can add a logo, favicon, and upload a thumbnail for your school. You can also choose your brand font and color palette.
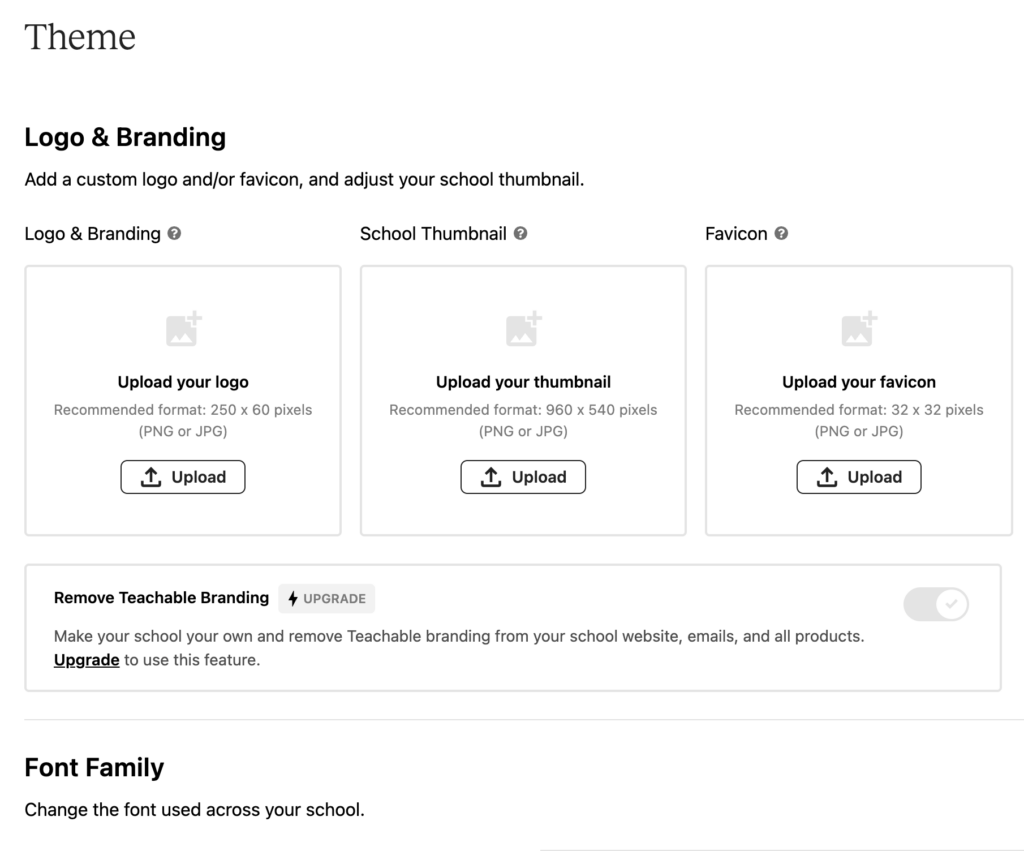
By default, you will get a domain name that ends with teachable.com. But you can set up a custom domain for your school website in Teachable if you’re on the Builder and higher plans.
Teachable also allows you to fully remove the Teachable branding from your school website, email, and landing pages. But for this, you should have a Growth or Higher plan.
Create and Manage Website Pages
You might have a question about how many pages I can create in Teachable.
This is a very important point because some platforms have a limit on the number of pages you can create with a specific plan.
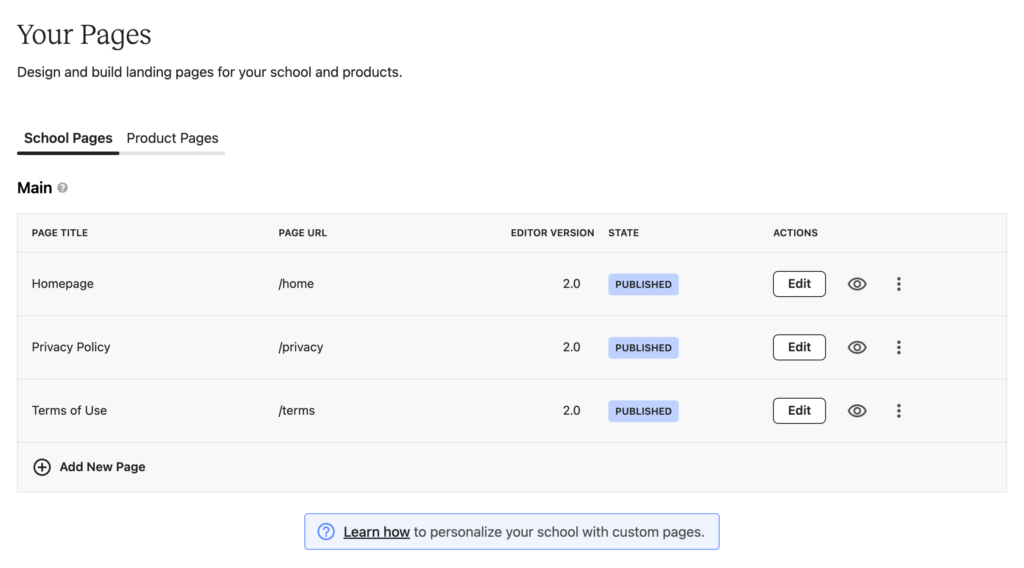
But in Teachable, there is no such limit; you can create as many pages as you want. Teachable gives you a dedicated area to manage all your pages, whether they are your school pages or individual product pages.
Under the school’s pages, you can see all the main school pages, such as Home, Privacy, and Terms of Use. And for each page, you’ll have quick options for editing, previewing, and publishing. Additionally, from there, you can also add more pages.
Similarly, if you switch to the product pages, you can select a product and manage its pages, such as sales, checkout, and thank you.
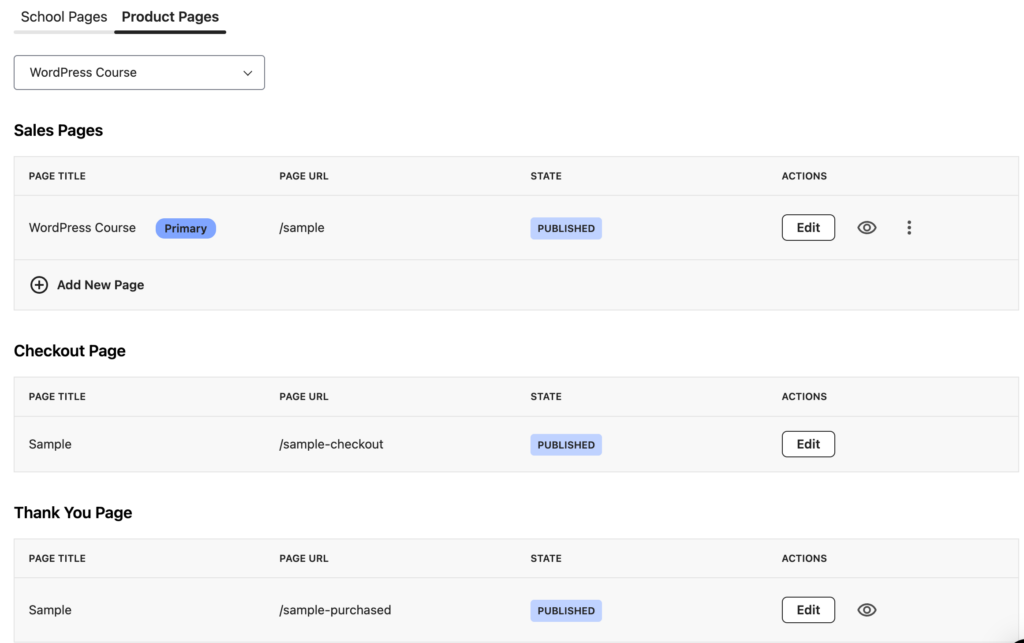
You can also manage your product pages under each product page. For example, if I want to build or edit pages for my specific course, I can go to my course dashboard. From there, I can easily manage the pages.
Website Landing Page Builder
The teachable page builder is very simple. For every digital product, you will get a pre-built sales page that comes with a single default template. Apart from that, there is no option to choose another pre-made template.
But you can customize and build landing pages using the Teachable website builder. But the Teachable website builder is very simple, and you have very limited pre-made blocks to build pages, as shown in the screenshot below.
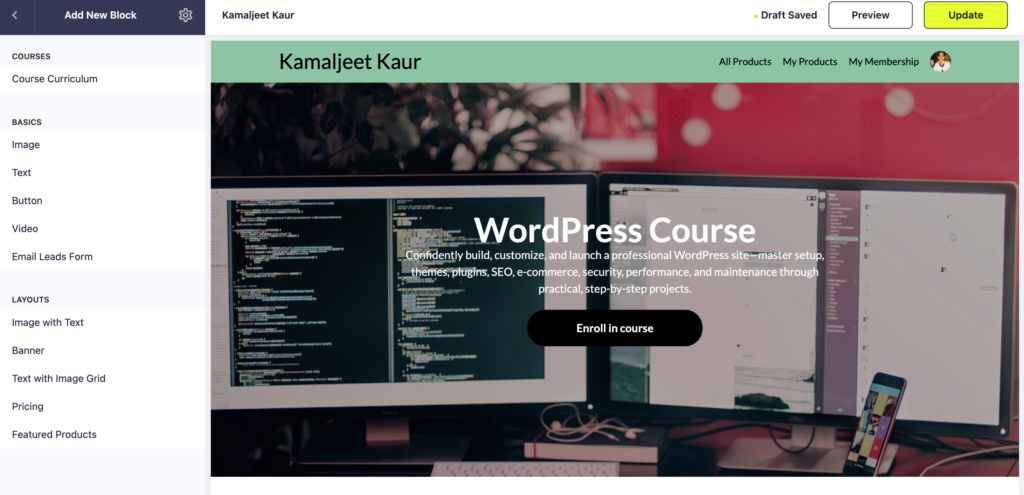
Apart from this, you can control the header and footer settings for your pages, such as enabling or disabling them. You can also make your headers overlap or transparent. Additionally, you can control the width of the header and footer.
For SEO metadata, Teachable lets you customize the page URL and add a page title and description. For every digital product, you will typically get 3 pages: sales, checkout, and thank-you.
Sales Landing Pages
You can add and build multiple sales pages for a single digital product in Teachable. Further, you can edit and customize it with pre-built blocks available in the Teachable website builder.
Checkout pages
The second most important page is the checkout page. There are not many customization options available for checkout pages.
But you can customize some things. For example, you can add up to 2 testimonials and up to 5 bullet points to reinforce the course value proposition on the checkout page. You can add a money-back guarantee section to your checkout pages.
Additionally, there are some checkout settings that you can customize at the school level. By default, you’ll see the “send me as a gift” option at checkout, but you can disable it. Additionally, you can enable the phone number and consent option for your checkout pages.
Thank you page.
Almost every course sales funnel will have a thank-you page after checkout. But you can customize and add more blocks, such as text, image, or upsells.
Navigation
Another thing I liked most about Teachable is that you can customize the navigation of your school website. And this feature is not commonly available in the LMS Tools. But in Teachable, you can add and customize links in the header and footer navigation.
You can also choose a separate home page for logged-out and logged-in users. For example, for the logged-out users, you can set the homepage as the homepage. For logged-in users, you can choose “product catalog & Dashboard” as the home page, so that students can directly access the courses and other digital products.
Customize Text
Teachable also comes with text customization features for overriding the default text with something unique to your brand. For example, sign up with “Register now” or contact us with “Get in touch.”
This is a great option if you love adding personal language across your website and product pages.
5) Marketing & Sales Tools
Membership & Collections
Teachable also allows you to create memberships and collections to sell multiple digital products together, even in the starter plan.
With the membership feature, you can create multiple tiers to sell multiple digital products, such as courses, coaching sessions, or digital downloads, on a subscription basis. You can preview the membership sales page and edit it as per your needs.
And for each tier, you can include the products and set monthly or yearly pricing. You can also offer a Free Trial. So, I created the following two sample tiers to see how the membership feature works.
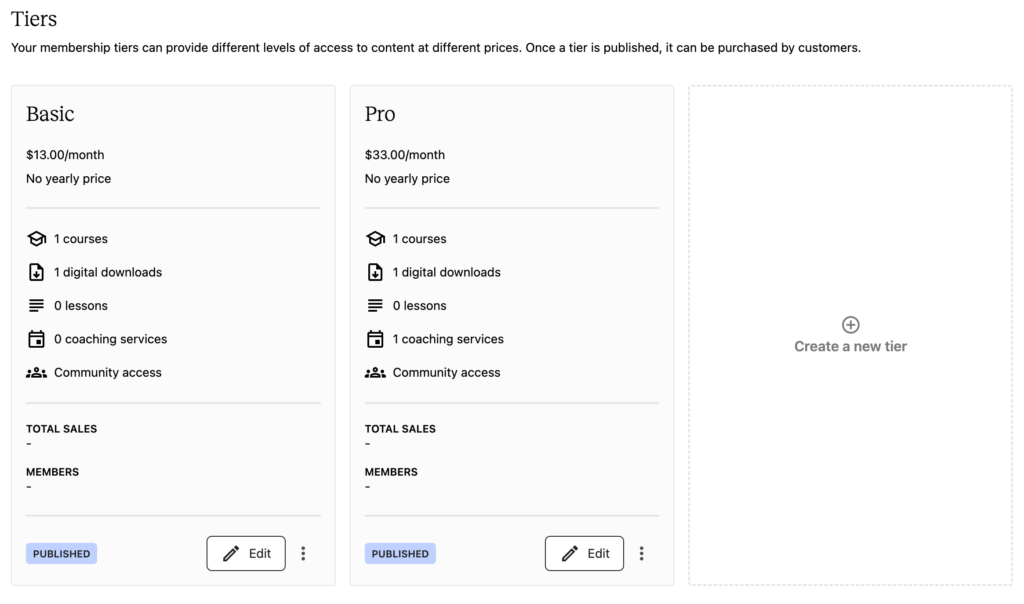
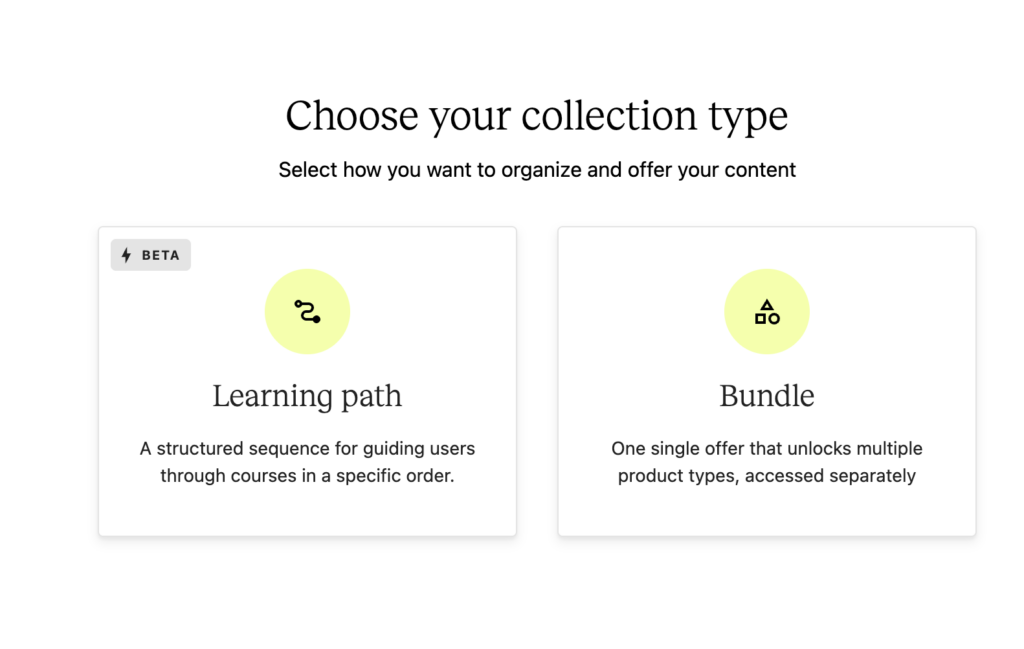
You can also bundle your courses, digital downloads, or coaching sessions for sale. You can choose products to include in a bundle or learning path and set the pricing for your bundle offer.
Coupons & Upsells
If you prefer running sales promotions, then you know the worth of coupons and upsells.
You can create coupons at the school level or for your specific products, such as courses, digital downloads, or webinars. You can specify whether you want to create a multiple-use or single-use coupon and set a coupon discount on a percentage or a flat basis.
Based on your promotional strategy, you can specify the coupon expiry date and set the limit on how many times a particular coupon can be used. Apart from this, Teachable also gives you the flexibility to enable or disable the coupon expiry or availability on the sales and checkout pages.
Teachable also allows you to create upsell offers for your digital products to earn more revenue and increase student lifetime value. The best thing is that the upsell feature is available even in the starter plan.
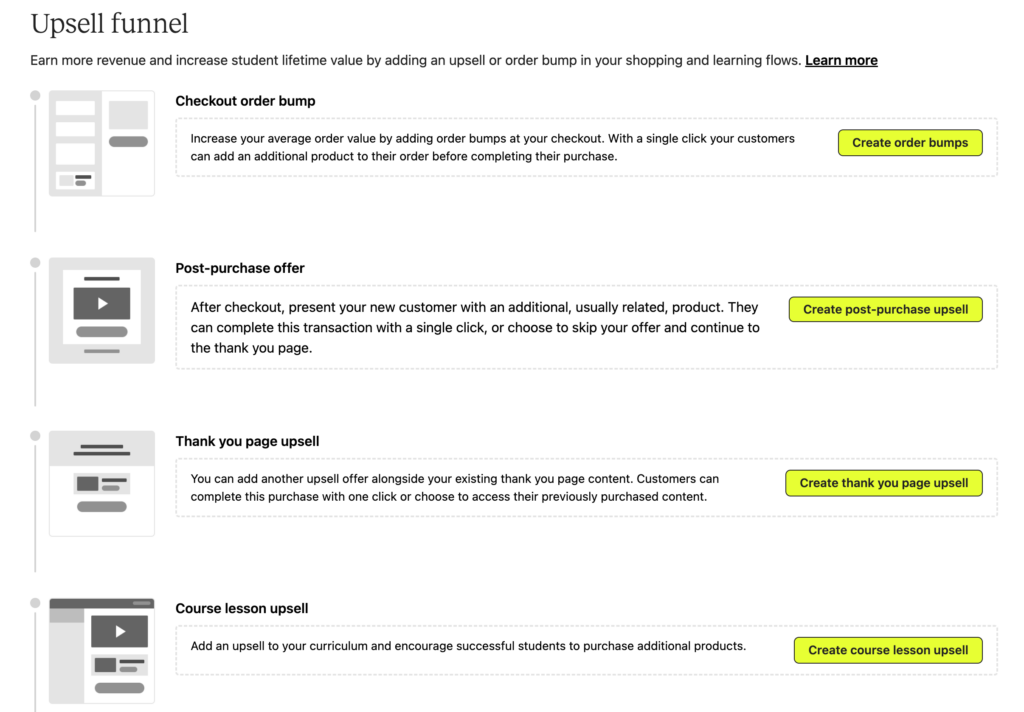
The most common upsells, or order bumps, that you can create in Teachable are the checkout order bump, the post-purchase offer, the thank-you page upsell, and the course lesson upsell.
Email Marketing
Teachable sends automated emails whenever any user completes any specific action. For example, if a user purchases a new course, Teachable automatically sends a purchase receipt email. So, don’t need to worry about that.
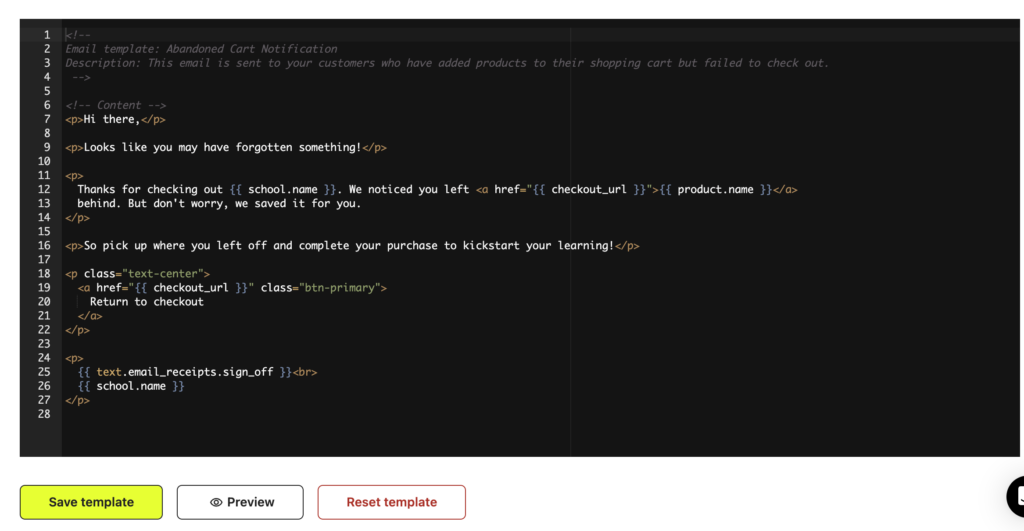
Teachable also gives the option to customize the automated email templates. But the teachable email editor is not easy to use for non-techies. Because there is no drag-and-drop email builder, it’s a code editor.
Here is an example of how the email template looks in the editor. So, to edit the templates in Teachable, you should have some coding skills. Otherwise, you may end up breaking the email design or copy.
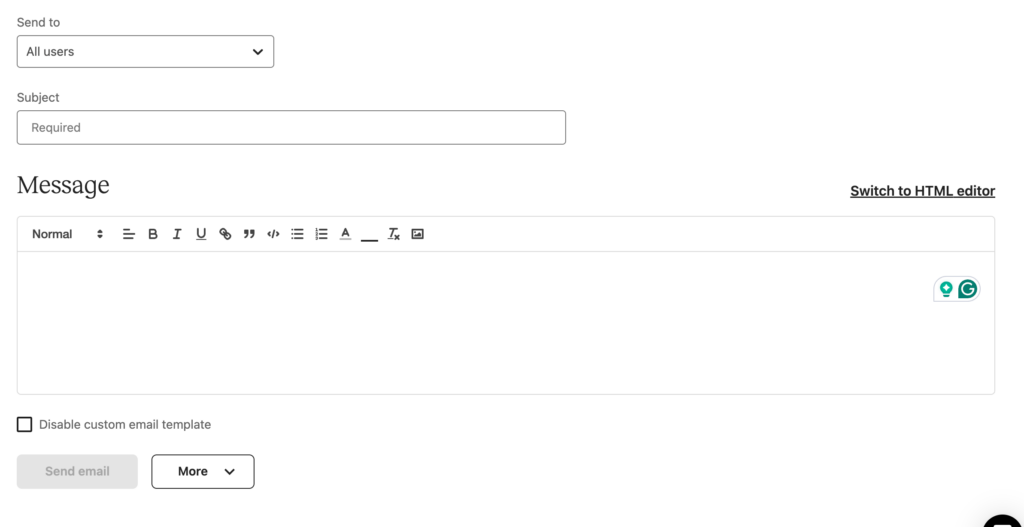
Within the Teachable platform, you also have the email composer tool. The composer tool is pretty simple; you choose whom you want to send the email to: individual users, enrolled users, or all users. Then simply enter the email subject and message in the dedicated sections.
Teachable also comes with the Abandoned Cart Emails feature. This is one of the best retargeting features that improves sales conversion for the students who entered their email at checkout but didn’t complete their purchase. You can send them the automated abandoned cart emails.
The good thing is, you don’t need to build the abandoned cart email from scratch. Teachable already has pre-made email templates. And within the same dashboard, you can see KPIs related to abandoned carts to analyze how many total abandoned cart emails were sent, how much revenue was received through abandoned cart emails, and the email conversion rate.
Dedicated Product Marketing Feature
Teachable also comes with some interesting product marketing features to market your products to your students across your school website.
For example, there is a “hero section” option in Teachable to highlight an important or newly launched product in the hero section of your product catalog and dashboard page.
Additionally, there is a featured links feature. Using this feature, you can add custom links to highlight products even in the student dashboard.
For example, if you launched a new course or webinar, you can highlight that in your student dashboard. Featured links allow you to add a headline, description, and CTA button for marketing your courses within the student dashboard.
There is also an option to add simple links to your student dashboard for interlinking courses.
6) Engagement Features
Teachable also has engagement features to keep your students engaged. So, let’s quickly cover that.
Comments
Comments are the most famous and simplest feature to initiate engagement. With Teachable, you can choose whether you want to enable/disable the comments section for your students.
There are some comment settings you can customize at the school level, such as enabling comment approval before making them live and allowing students to attach images with comments.
Additionally, there is a dedicated area in Teachable to manage all comments in a single place.
Community
Teachable also allows you to create a community space. And the community helps you and your students to communicate with each other.
You can control access to the community and select who can access: All students, members only, or students enrolled in specific courses.
Within the community, you can create channels for different topics and control who can access and post in those channels.
This is how the community interface looks. Well, there are no advanced customization options available.
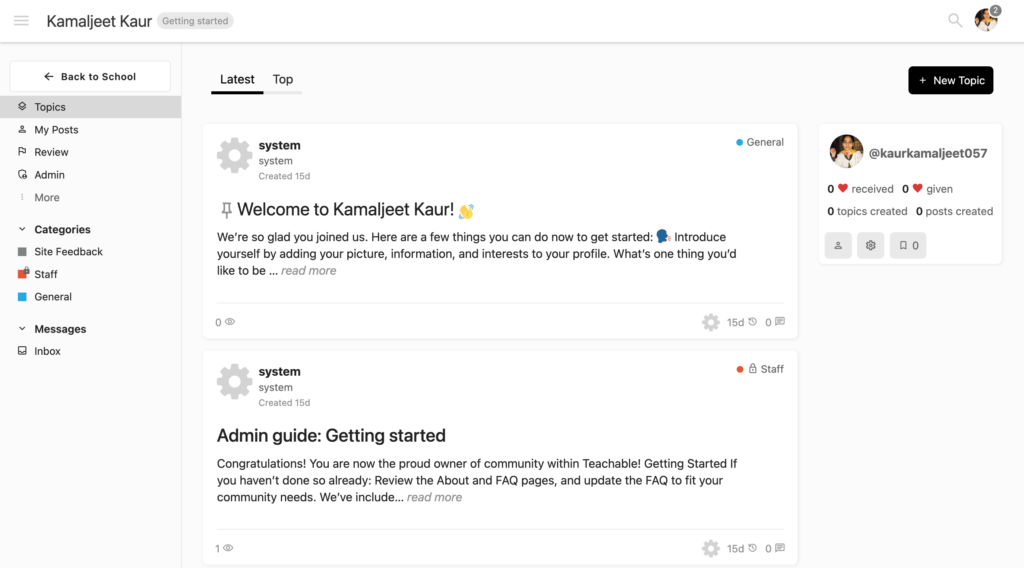
But you can customize some branding things. Such as customizing your community name, adding your brand logo, and colors.
7) Payments & Reporting
Choose your Desired Payment Mode
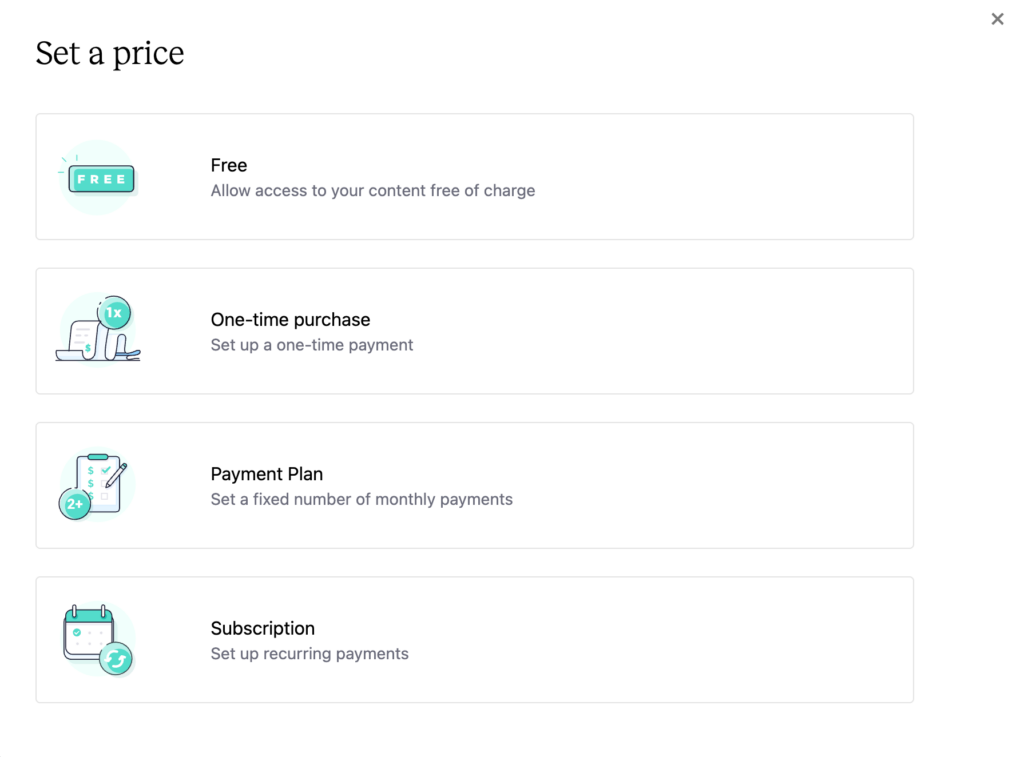
Teachable offers various options for setting up your product prices. You can sell your digital products as a free, one-time purchase fee or set up a subscription plan based on your business model.
Buy Now, Pay Later
Teachable also comes with a feature called “Backoffice”. With Backoffice, you can turn on the “Buy now, Pay later” feature. This is a great feature to increase purchases, because students can buy your course in installments.
But this feature costs you additionally. Firstly, there is a 2.8% transaction fee for using the Backoffice feature. There are also additional processing fees for these transactions. So, make sure you read their official guide before enabling the Buy Now, Pay Later feature.
Payout Gateways
To receive payouts from Teachable, you need to set up a payout gateway. Well, Teachable doesn’t offer many payment gateways.
One is PayPal, which is available across all countries. Another one is teachable pay, which even offers daily payouts. But the teachable pay option is not available in all countries.
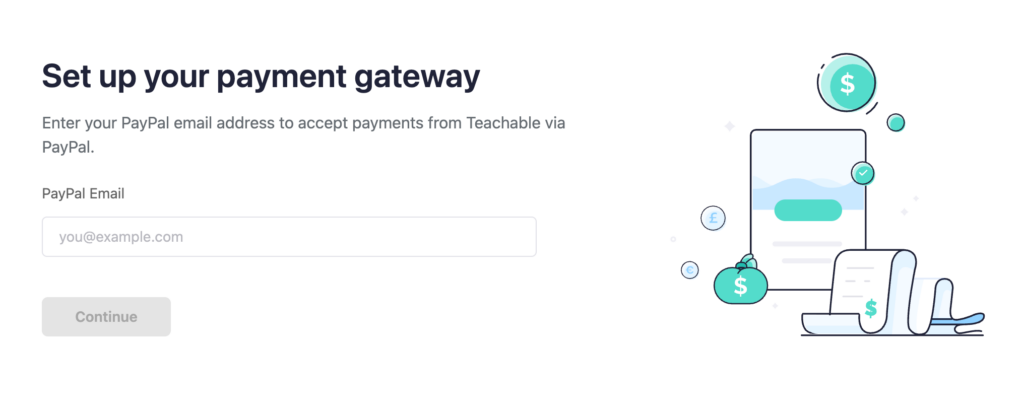
I also connected with the Teachable support team, and they told me that the Teachable Pay option is only available in a few countries.
I think Teachable should add more flexible payout gateway options. For example, I used to use PayPal, but it has higher transaction fees compared to other platforms like Payoneer. Teachable should add more payment gateway options so that users can choose their preferred payment option.
Choose Taxes Prices
With Teachable, you can choose whether you will pay the taxes or if your students will.
For example, if you set the course price to $100. Then, if you enable the tax-inclusive feature, the tax will not be included in the product price. So, your students will just pay whatever standard price ($100), excluding taxes.
If you disable the tax-inclusive features, your students will pay the tax based on their location, and the tax price will be added to the product price. So, in this case, the students will pay $100(product price) + $10 (tax amount)
Reporting & Analytics
In Teachable, there is a dedicated area to see all your transactions. You can even generate statements for schools, authors, and affiliates after 20 days of each month.
You can also see the sales breakdown by day and month to track your sales and revenue metrics. And also, there is a data report to analyze upsells.
8) Tracking & Integrations
Adding Coding Snippets
If you have some experience setting up tracking, you may already know about code snippets, such as Facebook tracking or analytics tools. So, with Teachable, you can add coding snippets to set up tracking.
Integrations
Teachable comes with an app hub. Here you can see the apps that you can connect with your Teachable account.
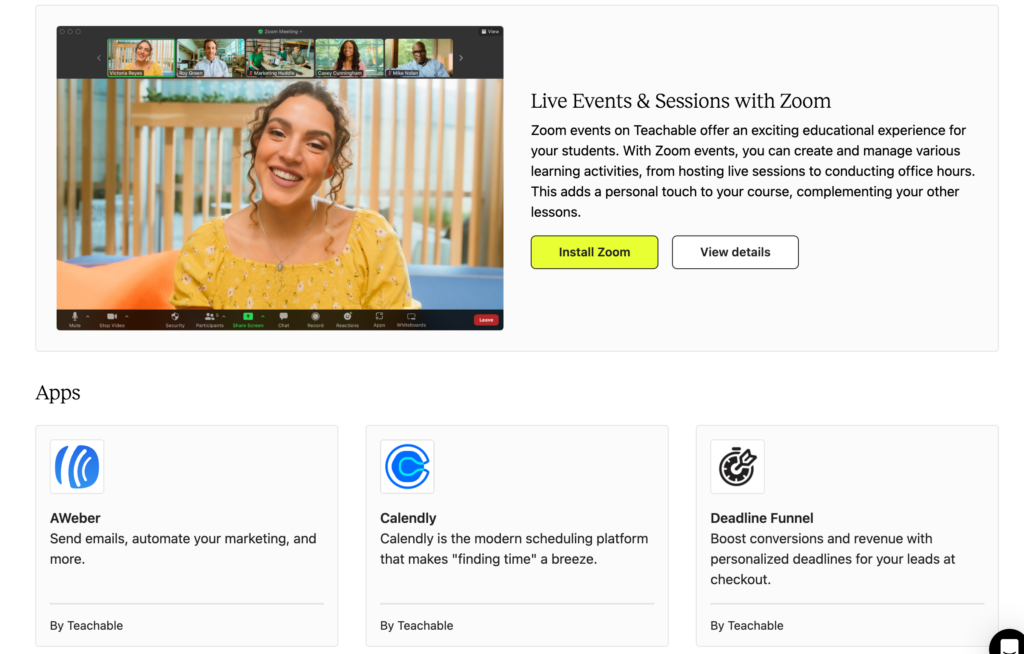
But how many apps you can connect depends upon which Teachable plan you’re using.
For example, with the starter plan, you can connect only 1 app. And, 3 with the builder, and 5 with the growth plan. But if you’re on the custom plan, you can connect unlimited apps.
Webhooks
If you don’t know what webhooks are, let me briefly explain.
Webhooks automatically send information from one app to another. Webhooks are event-based, meaning that if the set triggers, events, and conditions are met, only then the information will be shared with another application.
So, how is this useful?
For example, if a student has just registered for your course. And you want to store the student’s information in your CRM.
Instead of manually doing it, you can create a webhook. And then the new student’s information will be automatically stored in the CRM from your Teachable account, without any ongoing human involvement.
But the webhook option is only available in the higher plans, such as Growth and custom plans.
Teachable Plans & Pricing Review
Teachable offers plans for both online course creators and enterprise-level e-learning businesses.
In this article, I will cover educator plans that are perfect for online course creators. Teachable mainly offers 3 plans: Starter, Builder, and Growth. Every plan comes with a 7-day Free trial and a 30-day money-back guarantee.
Transaction Fees & Usage Limits
Almost every course platform has limits. Such as: how many products you can create, how many active students are allowed, or video storage. In the same way, Teachable also has limits, so let’s briefly cover them first.
| Starter | Builder | Growth | |
| Transaction fees | 7.5% | 0% | 0% |
| Products | 5 | 10 | 50 |
| Admins | 1 | 1 | 5 |
| Active students | 100 | 1000 | Up to 5000 |
| Imported Students | 5 | 50 | 1000 |
| Video storage | Up to 1TB | Up to 1TB | Up to 1TB |
Transaction Fee: Teachable only cuts the transaction fee if you’re on the starter plan. And on higher plans, there is no transaction fee. But keep in mind that there might be some payment processing taxes.
No. of Products: Next is the number of products you can create with each plan. The starter plan allows you to create 5 products. But Builder 10 and Growth 50 products. The product could be anything: a course, a coaching session, or a digital product. But if you’re creating bundle offers, memberships, or an online community, that is not considered a product.
No. of Admins: With both starter and builder plans, only 1 admin is allowed, but if you’re on the growth plan, you can create up to 5 admins.
Active Students: An active student means a student currently enrolled in one of the products. With the starter plan, only 100 active students are allowed. But 1000 with the builder plan, and the Growth plan allows up to 5000 active students.
Video Storage: Another thing you need to pay attention to is how much video storage you will get. If the storage is not enough, how will you upload video lessons? So, with each teachable plan, you get 1TB of video storage.
Teachable Plans Pricing Breakdown
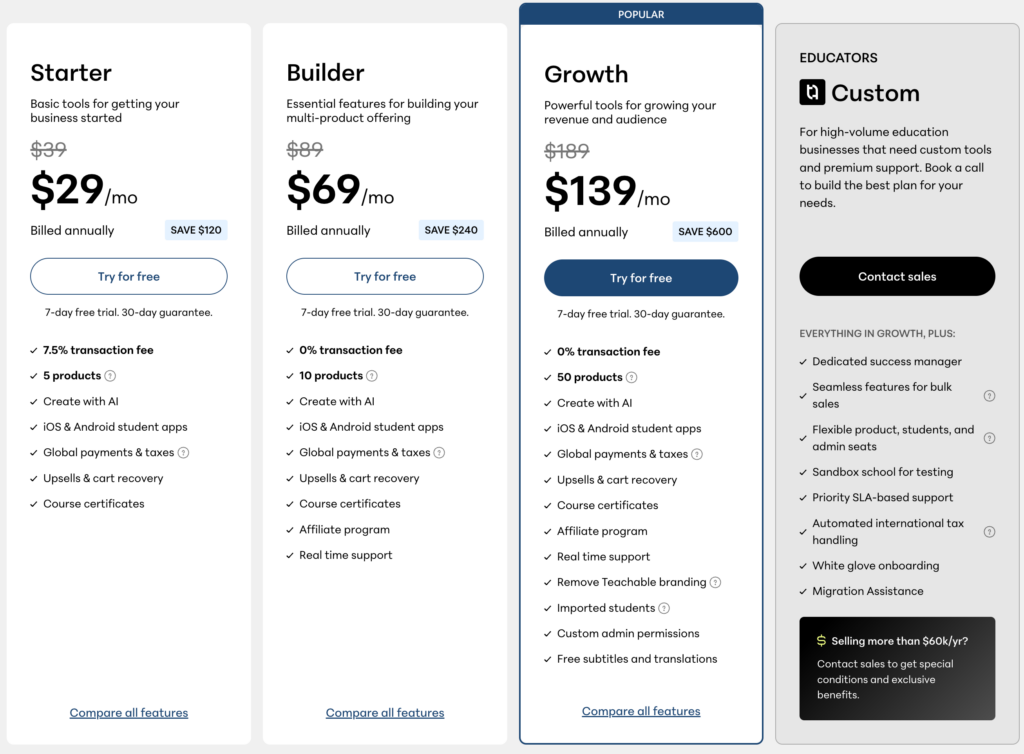
Starter Plan
The starter plan costs $29/month when you pay yearly, but $39/month when billed monthly. With the starter plan, you can only create 5 products.
The starter plan has everything to start your online course business. But this plan does not include features such as an affiliate program and real-time support. Another downside of this plan is the 7.5% transaction fee. That means, on every sales transaction, Teachable will cut its 7.5% fee.
Builder Plan
The Builder plan costs $69/month if you pay yearly and $89/month when billed monthly. This plan is perfect if you’re selling multiple digital products, as it supports 10 products. And the best thing is that you don’t have to pay any transaction fee. Means whatever you earn is yours, and Teachable will not deduct any transaction fee with the Builder plan.
Apart from this, it also comes with real-time support and an affiliate program. So, if your priority is to create an affiliate program to market your courses, then the Builder plan is perfect.
Growth Plan
It costs $139/month when billed yearly. But if you choose to pay monthly, it will cost you $189/month. With this plan, you can create 50 products.
It comes with advanced features, such as removing Teachable branding from your school and importing students.
In lower plans, you have to pay additionally for auto-generating subtitles. But with the Growth plan, this feature is included in the plan.
Custom Plan
Teachable offers a custom plan. So, if you’re a high-volume business, you can also build a customized plan for your needs. The custom plan gives you access to custom tools and premium support.
Teachable Pros & Cons
Teachable Pros: What I liked Most?
1. Beginner-friendly: The first thing that I liked most about Teachable is that its dashboard is easy to use. Creating and selling digital products is also super easy, as there are setup wizards to guide you. Within the platform, you have an AI chat support option. If you have any questions, you can ask. And the good thing is their AI chat is quite helpful. I asked a few questions, and it gives you proper answers with screenshots.
2. Tools to Build & Sell Multiple Digital Products: As we discussed earlier, Teachable not only allows you to create and sell courses. But it also supports multiple other digital products such as coaching and digital downloads.
3. Simple yet Powerful Lesson & Quiz Builder: You can easily build lesson content with video, text, images, and many other content blocks. And building quiz lessons is also so easy in Teachable. I really liked the AI quiz assistant feature. Because it does not create quiz questions randomly. But it actually creates quizzes based on the actual lesson content.
4. Supports membership & bundle offer feature: Another thing I liked most about Teachable is that it allows you to bundle your digital products and sell them on a membership basis or in a bundle offer. This is a very helpful feature if you’re creating multiple digital products and want to sell them on a subscription or collocation basis.
5. Even the starter plan has almost all the must-have features: I personally feel that the Teachable Starter plan has almost all the features, including creating and selling 5 digital products, website branding & builder features, lesson and quiz builder, coupons, payment process, upsells, email marketing, memberships, bundles, and many other tools. I think that’s all you need to start your online course business.
6. Free Trial & Money-Back Guarantee: If you want to give Teachable a try, then you can sign up for their 7-day Free trial on any of their plans. Additionally, it also has a 30-day money-back guarantee. In case you’re not satisfied after purchasing, you can opt for a money-back guarantee.
Cons of Teachable
1. Subtitle auto-generation cost on lower plans: Teachable allows you to create subtitles automatically for your videos on every plan. But if you’re on the lower plans, you have to pay additionally for auto-generating subtitles. Because this feature comes free with only the Growth or higher plan.
2. Basic website page builder & limited or no pre-made Templates: There are pre-made blocks to build landing pages. But there are no advanced pre-made blocks and design features. Also, there are no pre-made template options. Teachable landing pages come with a default template only, which you can customize with available tools.
3. Starter plan has a 7.5% transaction fee: If you’re choosing the teachable starter plan, then you have to pay a 7.5% transaction fee to teachable on every sale you make. But if you’re on the higher plans, there is no standard transaction fee.
4. Limited Payout Gateways: The other downside I realized with Teachable is that it mainly offers PayPal as a payout gateway to withdraw from Teachable. There is also a Teachable pay option, but that is only available in a few countries as of now. I think Teachable should add more flexible payout gateways such as direct bank transfer or Payoneer.
Final Thoughts: Who Should Use Teachable?
Now the main question is, for whom is Teachable best suited?
So, after testing Teachable, I found Teachable is best suited for beginner course creators and e-learning businesses looking for an easy-to-use, feature-rich, and affordable online course creation platform.
Teachable is quite affordable if you compare it with competitors, like Thinkfic or Kajabi. Additionally, Teachable is so easy to use, and almost all the must-have features are available even in the starter plan.